

Showing posts with label Web Design. Show all posts
Wednesday, January 25, 2017
Ajax jQuery File Upload with Codeigniter using BlueImp with image preview
Hello friends, are you looking for ajax based jquery file upload using codeiginter. Then here is tutorial for you. In this tutorial we will discuss about File Uploading using PHP Codeigniter and Jquery with ajax. Blueimp file upload gives you a best option for file uploading. I found this script very useful for my projects and I would like to share this information with you. Blueimp is a free open source code.Why Blueimp?
Blueimp is a file upload widget which can be used for multiple file uploads with validations and is highly secured. It also supports cross domain, chunked and resumable file uploads. It can be used for image, audio, video etc., It has a progress bar shown for each image and supports drag and drop. It works with any server side platform such as Google App Engine, PHP, Python, Ruby on Rails, Java etc., However in this tutorial we are going to discuss about PHP and Codeigniter.
Demo
Blueimp with codeigniter
As we already discussed that Blueimp supports PHP, so we can use with Codeigniter too. Blueimp wiki says that you can easily integrate this script with Codeigniter but when I tried to work with it I found it very hard to do. I made it simpler and will share it with you.
How to integrate Blueimp with Codeigniter?
Open constants.php file in config folder and add the below given code in it. You can add it at the bottom of the code in constants.php
// Define Ajax Request
define('IS_AJAX', isset($_SERVER['HTTP_X_REQUESTED_WITH']) && strtolower($_SERVER['HTTP_X_REQUESTED_WITH']) == 'xmlhttprequest');
Now create a new php file using any text editor and add the following code to it.
<?php

if (!defined('BASEPATH'))
    exit('No direct script access allowed');
class Upload extends CI_Controller {

    public function __construct() {
        parent::__construct();
        $this->load->helper(array('form', 'url', 'file'));
    }}
 public function do_upload() {
        $upload_path_url = base_url() . 'files/';
//you should create a folder uploads in the root directory of your codeigniter
        $config['upload_path'] = FCPATH . 'files/';
  //to allow only image files of below type
        $config['allowed_types'] = 'jpg|jpeg|png|gif';
  //max size to upload else return error message. change it to more if you want to allow large files
        $config['max_size'] = '50000';

        $this->load->library('upload', $config);

        if (!$this->upload->do_upload()) {


            //Load the list of existing files in the upload directory
            $existingFiles = get_dir_file_info($config['upload_path']);
            $foundFiles = array();
            $f=0;
            foreach ($existingFiles as $fileName => $info) {
              if($fileName!='thumbnails'){//Skip over thumbnails directory
                //set the data for the json array
                $foundFiles[$f]['name'] = $fileName;
                $foundFiles[$f]['size'] = $info['size'];
                $foundFiles[$f]['url'] = $upload_path_url . $fileName;
                $foundFiles[$f]['thumbnailUrl'] = $upload_path_url . 'thumbnails/' . $fileName;
                $foundFiles[$f]['deleteUrl'] = base_url() . 'upload/deleteImage/' . $fileName;
                $foundFiles[$f]['deleteType'] = 'DELETE';
                $foundFiles[$f]['error'] = null;

                $f++;
              }
            }
            $this->output
            ->set_content_type('application/json')
            ->set_output(json_encode(array('files' => $foundFiles)));
        } else {
            $data = $this->upload->data();

            // to re-size for thumbnail images un-comment and set path here and in json array
            $config = array();
            $config['image_library'] = 'gd2';
            $config['source_image'] = $data['full_path'];
            $config['create_thumb'] = TRUE;
            $config['new_image'] = $data['file_path'] . 'thumbnails/';
            $config['maintain_ratio'] = TRUE;
            $config['thumb_marker'] = '';
            $config['width'] = 300;
            $config['height'] = 100;
            $this->load->library('image_lib', $config);
            $this->image_lib->resize();


            //set the data for the json array
            $info = new StdClass;
            $info->name = $data['file_name'];
            $info->size = $data['file_size'] * 1024;
            $info->type = $data['file_type'];
            $info->url = $upload_path_url . $data['file_name'];
            // I set this to original file since I did not create thumbnails.  change to thumbnail directory if you do = $upload_path_url .'/thumbnails' .$data['file_name']
            $info->thumbnailUrl = $upload_path_url . 'thumbnails/' . $data['file_name'];
            $info->deleteUrl = base_url() . 'upload/deleteImage/' . $data['file_name'];
            $info->deleteType = 'DELETE';
            $info->error = null;

            $files[] = $info;
            //this is why we put this in the constants to pass only json data
            if (IS_AJAX) {
                echo json_encode(array("files" => $files));
                //this has to be the only data returned or you will get an error.
                //if you don't give this a json array it will give you a Empty file upload result error
                //it you set this without the if(IS_AJAX)...else... you get ERROR:TRUE (my experience anyway)
                // so that this will still work if javascript is not enabled
            } else {
                $file_data['upload_data'] = $this->upload->data();
                $this->load->view('upload/upload_success', $file_data);
            }
        }
    }
 public function deleteImage($file) {//gets the job done but you might want to add error checking and security
        $success = unlink(FCPATH . 'files/' . $file);
        $success = unlink(FCPATH . 'files/thumbnails/' . $file);
        //info to see if it is doing what it is supposed to
    $info = new StdClass;
        $info->sucess = $success;
        $info->path = base_url() . 'files/' . $file;
        $info->file = is_file(FCPATH . 'files/' . $file);

        if (IS_AJAX) {
            //I don't think it matters if this is set but good for error checking in the console/firebug
            echo json_encode(array($info));
        }
    }
Sunday, September 28, 2014
How to bounce an object with animated effect in css3
Hi friends, hope you are doing well. I am busy with my work so I can't post here regularly. Today I will teach you how to make an animated effect to an object, text or an image that bounces from left side of the page. In this tutorial I have used CSS3 styles to make animated effect to an image. In my latest project I came across a requirement where the logo (black and white) of the website must bounce from leftside and it stops at some point. There the image should be turned into it's original color. For this I have used JQuery. But I'm not giving you the whole code for the above requirement. Here I want to discuss only about the animated effect to bounce an object. Since I have used CSS3 it will be more effective than JQuery.Demo:

Look at the below code.
CSS3 code for animation effect:
<style>
.animated {
-webkit-animation-duration: 1s;
animation-duration: 1s;
-webkit-animation-fill-mode: both;
animation-fill-mode: both;
}
@keyframes bounceInLeft {
0% {
opacity: 0;
-webkit-transform: translateX(-2000px);
-ms-transform: translateX(-2000px);
transform: translateX(-2000px);
}
60% {
opacity: 1;
-webkit-transform: translateX(30px);
-ms-transform: translateX(30px);
transform: translateX(30px);
}
80% {
-webkit-transform: translateX(-10px);
-ms-transform: translateX(-10px);
transform: translateX(-10px);
}
100% {
-webkit-transform: translateX(0);
-ms-transform: translateX(0);
transform: translateX(0);
}
}
.bounceInLeft {
-webkit-animation-name: bounceInLeft;
animation-name: bounceInLeft;
}
</style>
How to use this in HTML?
Look below HTML demo code that shows how to use the CSS classes in HTML.
HTML:
<a href="http://www.trickstown.com/" title="Home Page" target="_blank">
<img src="https://blogger.googleusercontent.com/img/b/R29vZ2xl/AVvXsEh6bVcUZQgsuQJXzW-NpmHmKKPOGi-rk-wcn4nCI1H_Fd6ZGgWmY1DSGfZ1BK1dY2ieU4p4wzbdXQhyphenhyphenGXGnKByv5rXIia3fXlG1CRrLbeHc84Oq0tdjOHmUitLhCkLl5jQAY7B1MPkBrMs/s1600/trickstown.png" alt="Tricks Town" class="animated bounceInLeft" />
</a>Use class="animated bounceInLeft" in your HTML where ever you need the animation effect.
Ask your queries if any.
Demo:
Labels:
CSS3,
HTML5,
Tips and Tricks,
Web Design
Friday, March 28, 2014
How to display preview of image before upload using JQuery
 When our application needs to have an option for image uploads we use input tag in a form. The upload process is handled inside a PHP file which we can discuss in future. We have already discussed about hiding an image which is broken. File uploading is very easy but sometimes we even want to preview the image before it is uploaded.
 For this purpose we can use JQuery code which will show the image before it is uploaded. Today I am going to discuss about the code which helps you preview the image before upload.
Here is the code for showing image before uploading.
JQuery:
$(document).ready(function(){
$("#image").change(function(){
var file = document.getElementById("image").files[0];
var readImg = new FileReader();
readImg.readAsDataURL(file);
readImg.onload = function(e) {
$('.imagepreview').attr('src',e.target.result).fadeIn();
}
})
})
This code uses the advantage of HTML5 attribute. FileReader reads the file, here the file is an image. It fetches the URL of the current image to show up when it is selected through file browser field.
The above code jquery code fetches the image and shows the preview. Below is the HTML code which refers the above jquery code.
HTML:
<input name="image" type="file" class="image" id="image"><br/>
<img class="imagepreview" src="">
Since the above HTML code has no image in the source it displays a broken image, so in order to eliminate the broken image we can use the code for this link to avoid broken images or we can use the following CSS code instead of the code specified in the link. I recommend you to use the CSS code below.
CSS:
.imagepreview{width:500px;
display:none;}
Here are some helpful posts for bloggers and web designers.
Add Google Plus Follower Gadget For Blogger
How to add floating widget to blogger blog
Add awesome sticky footer menu to Blogger with simple HTML
How to trace details of an unknown person with mobile number
Why every freelance worker wants to be a blogger?
Which is the best way to optimize mobile site?
How facebook fan page can make you money?
Separate Contact page in Blogger
How to add Contact Form Widget to blogger Official Plugin
SEO Title Tag Best Practices
How to disable graph search on facebook/trick to remove facebook graph
How to find fake profile pictures on facebook?
Add Facebook Like Button below posts titles (Speed Loading)
How to delete Facebook account permanently?
How to use facebook on slow internet connections
How to delete Google Search History/Cache?
8 Tips to reduce load time of Blog/Website
Xenon Blogger Template Download
3 ways to make money online
5 Idiotic ways you can promote your blog
I have given you three blocks of code for image preview. Look below for the complete code after combining all the above blocks of code.
<html>
<head>
<meta http-equiv="Content-Type" content="text/html; charset=utf-8">
<title>Preview image before upload by TricksTown.com</title>
<script src="http://code.jquery.com/jquery-1.10.1.min.js"></script>
<script>
$(document).ready(function(){
$("#image").change(function(){
var file = document.getElementById("image").files[0];
var readImg = new FileReader();
readImg.readAsDataURL(file);
readImg.onload = function(e) {
$('.imagepreview').attr('src',e.target.result).fadeIn();
}
})
})
</script>
<style>
.imagepreview{width:500px;
display:none;}
</style>
</head>
<body>
<input name="image" type="file" class="image" id="image"><br/>
<img class="imagepreview" src="">
</body>
</html>
Copy the above code and paste it in your notepad. Save it with .html extension and check it.
Enjoy... :) Happy coding.
Thank you. If you have any doubts, please comment below. Spam comments will be removed. Labels: HTML5, JQuery, Web Design, Web Development
Thursday, March 27, 2014
How to hide or fix a broken image using jquery

You may like these
Get free likes for your facebook account.
Login script in PHP
Delete file using PHP
Delete Facebook account permanently
Disable graph search on Facebook
Pagination with PHP
Awesome stylish sliding professional contact form for your website
Use facebook on slow internet
How to delete google cache from search
How to scare your friends with simple code
Just look at the code below.
<script>
$(document).ready(function(){
$("img").error(function(){
$(this).hide();
});
})
</script>
Copy the above code and paste it above the closing </head> tag. That's it. You are done. is
Explanation:
$(document).ready(function()) says the function to execute when the page loads.$("img") finds the img tag.
error(function()) checks if the img tag has any error and executes the function to hide the broken image using $(this).hide();
Here this refers to the current one i.e., the img tag.
Thanks for reading this article. If you have any doubts please don't hesitate to comment below. Labels: blogger tips, JQuery, Web Design, Web Development
Wednesday, February 12, 2014
Create simple pagination with PHP and MySQL

Hi friends, todays tutorial is about creating a simple pagination using PHP and MySQL. I am going to explain you about creating a page with PREVIOUS and NEXT links at the bottom of your page with numberings.
Before looking at the code let's discuss about pagination concept. Pagination let's you create links that contains the data which is the continuation of the current item. Whenever there is large amount of data then it looks hard to load the entire data into a single page. Hence, we use the concept of pagination to allow the content to be split into parts and show only some part of the content per each page. This will give your website viewers a great experience and also has an advantage of speed loading of data, inorder to avoid the inconvenience.
You may also like:
Beautiful contact form for websites
Add Google plus follower widget to blogger
Stylish sticky menu bar with social icons for footer
Make money with facebook
Add contact form to your blogger blog free
Get more visitors to your site with SEO
Remove facebook graph search
Trick to find fake accounts on facebook
Get free mobile balance 100% working trick in India only
Speed loading like button for blogger
Delete facebook account permanently 100% working trick
Trick to use facebook on slow internet
How to get more page likes on facebook
How to delete google search history
8 Tricks to reduce load time of your website
3 ways to make money online without investment
5 idiotic ways to promote your blog
I said before that this code is based on PHP and MySQL, hence this code reads the data from the database tables and displays it on our page with pagination links. Since the data is being retrieved from the tables in the database we need to use sql connection mysql_connect() and then we need select database using mysql_select_db(). Let us see briefly how to connect to database using these two functions in PHP.
Code for Database connection:
<?phpThe above code is used for datavase connection. Now let's see the code that is required to generate pagination links.
$dbhostname = "host name here"; //replace with your host name usually localhostname
$dbusername = "database user name"; //replace with your database user name.
$dbpassword = "database password"; //replace with your password
$dbname = "database name"; //replace with your database name
$conn = mysql_connect($dbhostname, $dbusername, $dbpassword) or die ("Database connection failed");
mysql_select_db($dbname) or die ("Database selection failed");
?>
Code to generate pagination:
<?phpThe above part of the code is to generate pagination links. I have clearly explained within the comments. So please look the code carefully and understand it. The above code is not included with database connection. Hence we can combine both the above codes together as shown below.
function create_pagination($current_page, $total_pages)
{
$create_page_links = '';
// generates anchor tag for previous page if this is not first page
if ($current_page > 1)
{
$create_page_links .= '<a href="current-page-name.php?page=' . ($current_page - 1) . '">PREV</a> ';
}
// generates page links with numbers till the loop ends
for ($count = 1; $count <= $total_pages; $count++)
{
if ($current_page == $count)
{
$create_page_links .= ' ' . $count;
}
else
{
$create_page_links .= ' <a href="' . $_SERVER['PHP_SELF'] . '?page=' . $count . '"> ' . $count . '</a>';
}
}
// generates anchor tag link for next page if this is not last page
if ($current_page < $total_pages) {
$create_page_links .= ' <a href="' . $_SERVER['PHP_SELF'] . '?page=' . ($current_page + 1) . '">NEXT</a>';
}
return $create_page_links;
}
// Calculate pagination
$current_page = isset($_GET['page']) ? $_GET['page'] : 1;
$results_per_page =15; // displays number of results per single page replace 15 with number of pages you may want
$jump = (($current_page - 1) * $results_per_page); //3*2
$query = "select * FROM table_name order by id desc";//query to select from table
$result = mysql_query($query1);
$total = mysql_num_rows($result); //counts number of rows
$total_pages = ceil($total / $results_per_page);
$query = $query . " LIMIT $jump, $results_per_page";
$result = mysql_query($query);
while($row = mysql_fetch_array($result))
{
//your code here to retrieve rows
}
?>
<!--creates links to display at bottom with previous, next and page numbers-->
<div style="float:left; padding:20px">
<?php
if ($total_pages > 1)
{
echo create_pagination($current_page, $total_pages);
}
?>
</div>
Pagination code with database connection:
The above code is the final one.Copy the code and use it wherever you want.<?php$dbhostname = "host name here"; //replace with your host name usually localhostname
$dbusername = "database user name"; //replace with your database user name.
$dbpassword = "database password"; //replace with your password
$dbname = "database name"; //replace with your database name
$conn = mysql_connect($dbhostname, $dbusername, $dbpassword) or die ("Database connection failed");
mysql_select_db($dbname) or die ("Database selection failed");
function create_pagination($current_page, $total_pages)
{
$create_page_links = '';
// generates anchor tag for previous page if this is not first page
if ($current_page > 1)
{
$create_page_links .= '<a href="current-page-name.php?page=' . ($current_page - 1) . '">PREV</a> ';
}
// generates page links with numbers till the loop ends
for ($count = 1; $count <= $total_pages; $count++)
{
if ($current_page == $count)
{
$create_page_links .= ' ' . $count;
}
else
{
$create_page_links .= ' <a href="' . $_SERVER['PHP_SELF'] . '?page=' . $count . '"> ' . $count . '</a>';
}
}
// generates anchor tag link for next page if this is not last page
if ($current_page < $total_pages) {
$create_page_links .= ' <a href="' . $_SERVER['PHP_SELF'] . '?page=' . ($current_page + 1) . '">NEXT</a>';
}
return $create_page_links;
}
// Calculate pagination
$current_page = isset($_GET['page']) ? $_GET['page'] : 1;
$results_per_page =15; // displays number of results per single page replace 15 with number of pages you may want
$jump = (($current_page - 1) * $results_per_page); //3*2
$query = "select * FROM table_name order by id desc";//query to select from table
$result = mysql_query($query1);
$total = mysql_num_rows($result); //counts number of rows
$total_pages = ceil($total / $results_per_page);
$query = $query . " LIMIT $jump, $results_per_page";
$result = mysql_query($query);
while($row = mysql_fetch_array($result))
{
//your code here to retrieve rows}
?>
<!--creates links to display at bottom with previous, next and page numbers-->
<div style="float:left; padding:20px">
<?php
if ($total_pages > 1)
{
echo create_pagination($current_page, $total_pages);
}
?>
</div>
Note: Now just make these changes before using the code.
host name here //replace with your host name usually localhostname
database user name //replace with your database user name.
database password//replace with your password
database name //replace with your database name
current-page-name.php //Replace with the name of the page where this code is being used.
$results_per_page =15 //change 15 to whatever the number results you may want to display ina single page
//your code here to retrieve rows //Code to fetch the rows from a database table
Thanks for reading this articles.
If you still have any queries then please don't hesitate to comment below. Labels: MySQL, PHP, Web Design, Web Development
Sunday, February 2, 2014
CSS3 Stylish Contact Form with JQuery toggle and PHP
 Hi friends, we have discussed about creating a beautiful contact form before. We also discussed about the importance of a contact form. You must know why a contact form is important. If you are running a business and you own a website for your business then your customers can easily contact you through your website. This will let you get new customers through your business website. There are many chances of losing customers from you if you are not available to your customers. The chance of losing customers can be avoided with a simple contact form. This form is an advanced version of the previous contact form and is having stylish look. You need to think about the UI design of your contact form. Because the great looks of your form can impress your customers much more than the old looks. This form has a JQuery toggle slide down and has designed with CSS3 to add awesome looks to the form.
You may also like:
Beautiful contact form for websites
Add Google plus follower widget to blogger
Stylish sticky menu bar with social icons for footer
Make money with facebook
Add contact form to your blogger blog free
Get more visitors to your site with SEO
Remove facebook graph search
 Trick to find fake accounts on facebook
Get free mobile balance 100% working trick in India only
Speed loading like button for blogger
Delete facebook account permanently 100% working trick
Trick to use facebook on slow internet
How to get more page likes on facebook
How to delete google search history
8 Tricks to reduce load time of your website
3 ways to make money online without investment
5 idiotic ways to promote your blog
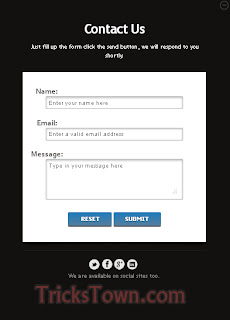
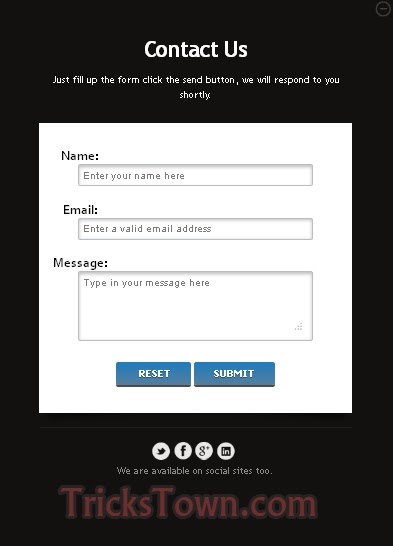
The form looks as shown in the first image and when you click on the plus button it will slide down and with a form. This leaves much more impression on your business. The messages sent through the form are received directly into your mail.View Demo
Now let's see the code that is needed for creating this stylish contact form.
First let us look at the HTML code to make a form.
<form action="send-mail.php" method="post">The above code is a simple HTML form with name, email and message fields and two buttons to reset the form and the other is to submit the form. I have shown you just a form in HTML. Just see that to learn how to create a form if you are new to HTML.
<div id="custom-form-inner">
<label for="name">Name:</label>
<input type="text" class="field" id="name" name="name" placeholder="Enter your name here">
<label for="email">Email:</label>
<input type="email" class="field" id="email" name="email" placeholder="Enter a valid email address">
<label for="message">Message:</label>
<textarea class="field textarea" id="message" name="msg" placeholder="Type in your message here"></textarea>
<br />
<input type="reset" class="btn" value=" Reset">
<input type="submit" name="send" class="btn" value="Submit">
</div>
</form>
Now I want to give you the actual HTML code required to create stylish contact form.
HTML code:
<div class="trickstown">Now that you have seen the HTML code for this stylish contact form and in the next step I'll show you the CSS required to apply styles to the form.
<span class="close">Close</span>
<div id="trickstown-contact-outer">
<div style=" border-bottom:1px solid #1d1d1d;" id="bioinfo">
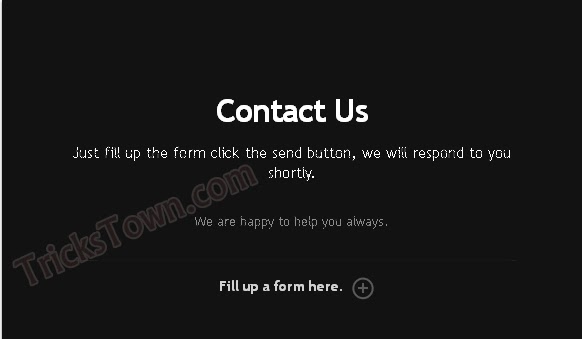
<h1>Contact Us</h1><br/>
<h2>Just fill up the form click the send button, we will respond to you shortly.</h2>
<p id="my-tt-message" style="display: block; text-align: center;height: 18px; margin-bottom: 30px; margin-top: 20px;">We are happy to help you always.</p>
<div id="image">
<div id="trickstown-contact-wrap">
<form action="send-mail.php" method="post">
<div id="custom-form-inner">
<label for="name">Name:</label>
<input type="text" class="field" id="name" name="name" placeholder="Enter your name here">
<label for="email">Email:</label>
<input type="email" class="field" id="email" name="email" placeholder="Enter a valid email address">
<label for="message">Message:</label>
<textarea class="field textarea" id="message" name="msg" placeholder="Type in your message here"></textarea>
<br />
<input type="reset" class="btn" value=" Reset">
<input type="submit" name="send" class="btn" value="Submit">
</div>
</form>
</div>
</div>
</div>
<p class="fill-form" style="display: block; "><span>Fill up a form here.</span></p>
<ul id="trickstown-social-icons">
<li><a class="twitter" target="_blank" href="http://www.twitter.com/user-name" title="@trickstown on Twitter">Twitter</a></li>
<li><a class="facebook" target="_blank" href="http://www.facebook.com/user-name" title="Facebook Profile">Facebook</a></li>
<li><a class="google-plus" target="_blank" href="https://plus.google.com/+user-name/" title="Google+ Profile">Google+</a></li>
<li><a class="linkedin" target="_blank" href="http://in.linkedin.com/in/user-name" title="Linkedin Profile">LinkedIn</a></li>
</ul>
<p id="trickstown-info" style="font-size: 14px;line-height: 22px;">We are available on social sites too.</p>
</div>
</div>
CSS Code:
<style>The above code is to apply styles to the contact form. This is a CSS3 code to bring you out the awesome look for a contact form.
.trickstown{
background-color:#111111;
margin:0 auto;
margin-top:200px;
width:560px;
padding:10px;
height:320px;
-webkit-box-shadow: 0 1px 2px #666;
box-shadow: 0 1px 2px #666;
}
#trickstown-contact-outer{
font-family:"Trebuchet MS", Arial, Helvetica, sans-serif;
text-align:center;
width:450px;
margin:0 auto;
margin-top:80px;
}
#bioinfo{background-color:#111111;
position:relative;
z-index:999;
}
#trickstown-contact-outer h1{color:#FFF;
font-family:"Trebuchet MS", Arial, Helvetica, sans-serif;
font-size:32px;
font-weight:700px;
margin:0;
padding:0;
letter-spacing:-1px;
}
#trickstown-contact-outer h2{ color:#FFF;
margin:0;
padding:0;
font-weight:100;
font-size:15px;
font-family:"Trebuchet MS", Arial, Helvetica, sans-serif;
margin-top:-10px;
margin-bottom:30px;
}
#my-tt-message{font-size: 13px;
line-height: 18px;
width: 375px;
display: block;
margin: 20px auto 30px;
color:#888888
}
.fill-form{font-size: 14px;
font-weight: 700;
color: #fff;
display: inline-block;
text-decoration: none;
line-height: 22px;
cursor: pointer;
margin-right: 10px;
}
#trickstown-contact-outer p {
color: #888888;
}
#trickstown-contact-outer .fill-form span {font-size: 14px;
font-weight: 700;
color: #fff;d
isplay: inline-block;
text-decoration: none;
line-height: 22px;
position: relative;
opacity: .8;
filter: alpha(opacity=80);
cursor: pointer;
margin-right: 10px;
margin-top:20px;}
#trickstown-contact-outer .fill-form span:after {content:url(https://blogger.googleusercontent.com/img/b/R29vZ2xl/AVvXsEjz-hFoiGnOZ-ZF-rRy1EzQvYs3irhpWYPyo_i0WN4XjBEOuPCnIBUBOiQMFHm6f37UP1-_fJj_g9CZBN5ZpIoau88zrGUKXR9J_EoEGd_hQk6hoaQSovdCeUCL-eGv3ULse0t5xxF01w/s1600/read-more-plus.png);
position: absolute;
top: 0;
right: -30px;
opacity: .4;
filter: alpha(opacity=40);
}
#trickstown-contact-outer .fill-form span:hover {
border-bottom: 1px solid #fe544a;}
#trickstown-contact-outer .fill-form span:hover:after{opacity:1;
filter:alpha(opacity=100)}
.close {cursor: pointer;
width: 23px;
height: 23px;
background: url(https://blogger.googleusercontent.com/img/b/R29vZ2xl/AVvXsEhQ8H-WlCLYHX6GHmo5DDUNkexhrJHv2KhLkoMQ7GoMnDyrnwg4OER29A3Y_oFnZLnpx3t8ElaFNM7cF4h5lixX0ykAe1pv-loBakvoPU7Uf9caI4G3VL5VZmwlk2ky5XumPXIdREGSiQ/s1600/profile-close.png) no-repeat;
opacity: .2;
filter: alpha(opacity=20);
text-indent: -9999px;
float:right;d
isplay:none;
}
.close:hover{opacity:1;
filter:alpha(opacity=100)}
#image{ display:none;
position:relative;}
#trickstown-social-icons {
position: relative;
top: -97px;
list-style: none;
margin: 0 auto 50px;
padding: 0;
width: 125px;
text-align: center;}
#trickstown-social-icons li a {
background: url(https://blogger.googleusercontent.com/img/b/R29vZ2xl/AVvXsEigR6CQ9AENc6jsyjgQfNEIdmRr30U6k3gVHJi2WokvgLmw1_kP982nL3OrY5JpJ0N5DT_4G45YawsK8_3Zupm4HXdQbafSex7ZI5qA125yZ7Ft9A2FCVRHwdcvPXt4gVb6_cuU4U6fmA/s1600/social-icons.png) no-repeat;
text-indent: -9999px;
margin: 0 5px 5px 0;
width: 26px;
height: 26px;
opacity: .9;
filter: alpha(opacity=90);
float:left;
}
#trickstown-social-icons .twitter {
background-position: -54px -80px;
}
#trickstown-social-icons .facebook {
background-position: -27px 0;
}
#trickstown-social-icons .google-plus {
background-position: -54px -26px;
}
#trickstown-social-icons .linkedin {
background-position: -54px -53px;
}
#trickstown-info{display:none;}
#trickstown-contact-wrap:before, #trickstown-contact-wrap:after {
z-index: -1;
position: absolute;
content: "";
bottom: 15px;
left: 10px;
width: 50%;
top: 80%;
max-width:300px;
background: rgba(0, 0, 0, 0.7);
-webkit-box-shadow: 0 15px 10px rgba(0,0,0, 0.7);
-moz-box-shadow: 0 15px 10px rgba(0, 0, 0, 0.7);
box-shadow: 0 15px 10px rgba(0, 0, 0, 0.7);
-webkit-transform: rotate(-3deg);
-moz-transform: rotate(-3deg);
-o-transform: rotate(-3deg);
-ms-transform: rotate(-3deg);
transform: rotate(-3deg);
}
#trickstown-contact-wrap:after {
-webkit-transform: rotate(3deg);
-moz-transform: rotate(3deg);
-o-transform: rotate(3deg);
-ms-transform: rotate(3deg);
transform: rotate(3deg);
right: 10px;
left: auto;
}
#trickstown-contact-wrap .btn {
margin-top: 10px;
margin-left:auto;
margin-right:auto;
padding: 7px 25px;
cursor: pointer;
color: #fff;
font: bold 13px Tahoma, Verdana, Arial;
text-transform: uppercase;
overflow: visible; /* IE6/7 fix */
border: 0;
background-color: #557f9d;
background-image: -moz-linear-gradient(#227bb9, #557f9d);
background-image: -webkit-gradient(linear, left top, left bottom, from(#227bb9), to(#557f9d));
background-image: -webkit-linear-gradient(#227bb9, #557f9d);
background-image: -o-linear-gradient(#227bb9, #557f9d);
background-image: -ms-linear-gradient(#227bb9, #557f9d);
background-image: linear-gradient(#227bb9, #557f9d);
filter: progid:DXImageTransform.Microsoft.gradient(startColorStr='#227bb9', EndColorStr='#557f9d');
-moz-border-radius: 3px;
-webkit-border-radius: 3px;
border-radius: 3px;
text-shadow: 0 1px 0 rgba(0,0,0,.3);
-moz-box-shadow: 0 1px 0 rgba(255, 255, 255, 0.5), 0 3px 0 rgba(0, 0, 0, 0.7);
-webkit-box-shadow: 0 1px 0 rgba(255, 255, 255, 0.5), 0 3px 0 rgba(0, 0, 0, 0.7);
box-shadow: 0 1px 0 rgba(255, 255, 255, 0.5), 0 3px 0 rgba(0, 0, 0, 0.7);
}
#trickstown-contact-wrap .btn:hover {
background-color: #557f9d;
background-image: -moz-linear-gradient(#557f9d, #a5b8da);
background-image: -webkit-gradient(linear, left top, left bottom, from(#557f9d), to(#a5b8da));
background-image: -webkit-linear-gradient(#557f9d, #a5b8da);
background-image: -o-linear-gradient(#557f9d, #a5b8da);
background-image: -ms-linear-gradient(#557f9d, #a5b8da);
background-image: linear-gradient(#557f9d, #a5b8da);
filter: progid:DXImageTransform.Microsoft.gradient(startColorStr='#557f9d', EndColorStr='#a5b8da');
}
#trickstown-contact-wrap .btn:active {
background: #64799e;
position: relative;
top: 2px;
-moz-box-shadow: 0 0 3px rgba(0, 0, 0, 0.7) inset;
-webkit-box-shadow: 0 0 3px rgba(0, 0, 0, 0.7) inset;
box-shadow: 0 0 3px rgba(0, 0, 0, 0.7) inset;
}
#trickstown-contact-wrap form {
background: #fff;
height: auto;
min-height:400px;
}
#trickstown-contact-wrap #custom-form-inner {
margin: 0 auto;
padding-top: 35px;
padding-bottom: 40px;
margin-bottom:20px;
}
#trickstown-contact-wrap label {
font: bold 18px/25px Corbel, Arial, Helvetica;
text-shadow: 0 1px 0 #fff, 0 2px 0 #ccc;
float: left;
margin-right: 10px;
width: 120px;
}
#trickstown-contact-wrap .field {
font: 15px Arial, Helvetica;
padding: 5px;
margin: 0 0 20px 0;
border: 1px solid #b9bdc1;
width: 75%;
color: #797979;
-moz-box-shadow: 0 2px 4px #bbb inset;
-webkit-box-shadow: 0 2px 4px #bbb inset;
box-shadow: 0 2px 4px #bbb inset;
-moz-border-radius: 3px;
-webkit-border-radius: 3px;
border-radius: 3px;
}
#trickstown-contact-wrap .field:focus {
background-color: #F6F5F4;
border-color:rgb(12, 155, 126);
box-shadow:0 0 4px rgb(12, 155, 126);
-webkit-box-shadow:0 0 4px rgb(12, 155, 126);
-moz-box-shadow:0 0 4px rgb(12, 155, 126);
}
#trickstown-contact-wrap .textarea {
height:auto;
min-height:100px;
max-width:75%;
}
</style>
Now we have discussed about the HTML and CSS codes required for the form. Now we have to look at JQuery code to apply toggle slide effect to the contact form.
JQuery Code:
<script src="http://code.jquery.com/jquery-1.10.1.min.js"></script>The above code is the required JQuery code to give you the best slide effects and toggle effects to your contact form.
<script>
$(document).ready(function(){
$('.fill-form').click(function(){
$(this).slideUp(300);
$('#my-tt-message').slideUp(300);
$('.trickstown').animate({height: "250px",marginTop: "250px"}, 500, function(){
$(this).delay(400).animate({height: "780px",marginTop: "80px",marginBottom: "80px"}, 500);
$('#bioinfo').delay(250).animate({marginTop: "-30px"}, 500);
$('.close').delay(50).fadeIn('slow');
$('#image').delay(1000).fadeIn('slow');
$('#trickstown-social-icons').delay(1000).slideDown('slow').animate({top: "20px"}, 500);
$('#trickstown-info').delay(1000).fadeIn(600);
});
});
$('.close').click(function(){
$(this).delay(100).fadeOut('slow');
$('#trickstown-social-icons').slideUp('slow').animate({top: "-97px"}, 500);
$('#bioinfo').delay(250).animate({marginTop: "0"}, 500);
$('#image').delay(100).fadeOut('slow');
$('#trickstown-info').hide();
$('.trickstown').delay(500).animate({height: "250px",marginTop: "250px"}, 500).delay(300).animate({height: "320px",marginTop: "200px"}, 500,function(){
$('.fill-form').slideDown(300);
$('#my-tt-message').slideDown(300);
});
});
});
</script>
Now let us put all the code together. The below code is the combination of all the above three. Copy the below code and save it as contact.html
contact.html
Copy the above code and paste it in any text editor such as notepad and save it as contact.html. Replace user-name to your user name of your social networks. Now your contact form is ready and you need to create one more page where the mail is sent to you. This page contains the configuration to send and receive mails through php.
<script src="http://code.jquery.com/jquery-1.10.1.min.js"></script>
<script>
$(document).ready(function(){
$('.fill-form').click(function(){
$(this).slideUp(300);
$('#my-tt-message').slideUp(300);
$('.trickstown').animate({height: "250px",marginTop: "250px"}, 500, function(){
$(this).delay(400).animate({height: "780px",marginTop: "80px",marginBottom: "80px"}, 500);
$('#bioinfo').delay(250).animate({marginTop: "-30px"}, 500);
$('.close').delay(50).fadeIn('slow');
$('#image').delay(1000).fadeIn('slow');
$('#trickstown-social-icons').delay(1000).slideDown('slow').animate({top: "20px"}, 500);
$('#trickstown-info').delay(1000).fadeIn(600);
});
});
$('.close').click(function(){
$(this).delay(100).fadeOut('slow');
$('#trickstown-social-icons').slideUp('slow').animate({top: "-97px"}, 500);
$('#bioinfo').delay(250).animate({marginTop: "0"}, 500);
$('#image').delay(100).fadeOut('slow');
$('#trickstown-info').hide();
$('.trickstown').delay(500).animate({height: "250px",marginTop: "250px"}, 500).delay(300).animate({height: "320px",marginTop: "200px"}, 500,function(){
$('.fill-form').slideDown(300);
$('#my-tt-message').slideDown(300);
});
});
});
</script>
<style>
.trickstown{
background-color:#111111;
margin:0 auto;
margin-top:200px;
width:560px;
padding:10px;
height:320px;
-webkit-box-shadow: 0 1px 2px #666;
box-shadow: 0 1px 2px #666;
}
#trickstown-contact-outer{
font-family:"Trebuchet MS", Arial, Helvetica, sans-serif;
text-align:center;
width:450px;
margin:0 auto;
margin-top:80px;
}
#bioinfo{background-color:#111111;
position:relative;
z-index:999;
}
#trickstown-contact-outer h1{color:#FFF;
font-family:"Trebuchet MS", Arial, Helvetica, sans-serif;
font-size:32px;
font-weight:700px;
margin:0;
padding:0;
letter-spacing:-1px;
}
#trickstown-contact-outer h2{ color:#FFF;
margin:0;
padding:0;
font-weight:100;
font-size:15px;
font-family:"Trebuchet MS", Arial, Helvetica, sans-serif;
margin-top:-10px;
margin-bottom:30px;
}
#my-tt-message{font-size: 13px;
line-height: 18px;
width: 375px;
display: block;
margin: 20px auto 30px;
color:#888888
}
.fill-form{font-size: 14px;
font-weight: 700;
color: #fff;
display: inline-block;
text-decoration: none;
line-height: 22px;
cursor: pointer;
margin-right: 10px;
}
#trickstown-contact-outer p {
color: #888888;
}
#trickstown-contact-outer .fill-form span {font-size: 14px;
font-weight: 700;
color: #fff;d
isplay: inline-block;
text-decoration: none;
line-height: 22px;
position: relative;
opacity: .8;
filter: alpha(opacity=80);
cursor: pointer;
margin-right: 10px;
margin-top:20px;}
#trickstown-contact-outer .fill-form span:after {content:url(https://blogger.googleusercontent.com/img/b/R29vZ2xl/AVvXsEjz-hFoiGnOZ-ZF-rRy1EzQvYs3irhpWYPyo_i0WN4XjBEOuPCnIBUBOiQMFHm6f37UP1-_fJj_g9CZBN5ZpIoau88zrGUKXR9J_EoEGd_hQk6hoaQSovdCeUCL-eGv3ULse0t5xxF01w/s1600/read-more-plus.png);
position: absolute;
top: 0;
right: -30px;
opacity: .4;
filter: alpha(opacity=40);
}
#trickstown-contact-outer .fill-form span:hover {
border-bottom: 1px solid #fe544a;}
#trickstown-contact-outer .fill-form span:hover:after{opacity:1;
filter:alpha(opacity=100)}
.close {cursor: pointer;
width: 23px;
height: 23px;
background: url(https://blogger.googleusercontent.com/img/b/R29vZ2xl/AVvXsEhQ8H-WlCLYHX6GHmo5DDUNkexhrJHv2KhLkoMQ7GoMnDyrnwg4OER29A3Y_oFnZLnpx3t8ElaFNM7cF4h5lixX0ykAe1pv-loBakvoPU7Uf9caI4G3VL5VZmwlk2ky5XumPXIdREGSiQ/s1600/profile-close.png) no-repeat;
opacity: .2;
filter: alpha(opacity=20);
text-indent: -9999px;
float:right;d
isplay:none;
}
.close:hover{opacity:1;
filter:alpha(opacity=100)}
#image{ display:none;
position:relative;}
#trickstown-social-icons {
position: relative;
top: -97px;
list-style: none;
margin: 0 auto 50px;
padding: 0;
width: 125px;
text-align: center;}
#trickstown-social-icons li a {
background: url(https://blogger.googleusercontent.com/img/b/R29vZ2xl/AVvXsEigR6CQ9AENc6jsyjgQfNEIdmRr30U6k3gVHJi2WokvgLmw1_kP982nL3OrY5JpJ0N5DT_4G45YawsK8_3Zupm4HXdQbafSex7ZI5qA125yZ7Ft9A2FCVRHwdcvPXt4gVb6_cuU4U6fmA/s1600/social-icons.png) no-repeat;
text-indent: -9999px;
margin: 0 5px 5px 0;
width: 26px;
height: 26px;
opacity: .9;
filter: alpha(opacity=90);
float:left;
}
#trickstown-social-icons .twitter {
background-position: -54px -80px;
}
#trickstown-social-icons .facebook {
background-position: -27px 0;
}
#trickstown-social-icons .google-plus {
background-position: -54px -26px;
}
#trickstown-social-icons .linkedin {
background-position: -54px -53px;
}
#trickstown-info{display:none;}
#trickstown-contact-wrap:before, #trickstown-contact-wrap:after {
z-index: -1;
position: absolute;
content: "";
bottom: 15px;
left: 10px;
width: 50%;
top: 80%;
max-width:300px;
background: rgba(0, 0, 0, 0.7);
-webkit-box-shadow: 0 15px 10px rgba(0,0,0, 0.7);
-moz-box-shadow: 0 15px 10px rgba(0, 0, 0, 0.7);
box-shadow: 0 15px 10px rgba(0, 0, 0, 0.7);
-webkit-transform: rotate(-3deg);
-moz-transform: rotate(-3deg);
-o-transform: rotate(-3deg);
-ms-transform: rotate(-3deg);
transform: rotate(-3deg);
}
#trickstown-contact-wrap:after {
-webkit-transform: rotate(3deg);
-moz-transform: rotate(3deg);
-o-transform: rotate(3deg);
-ms-transform: rotate(3deg);
transform: rotate(3deg);
right: 10px;
left: auto;
}
#trickstown-contact-wrap .btn {
margin-top: 10px;
margin-left:auto;
margin-right:auto;
padding: 7px 25px;
cursor: pointer;
color: #fff;
font: bold 13px Tahoma, Verdana, Arial;
text-transform: uppercase;
overflow: visible; /* IE6/7 fix */
border: 0;
background-color: #557f9d;
background-image: -moz-linear-gradient(#227bb9, #557f9d);
background-image: -webkit-gradient(linear, left top, left bottom, from(#227bb9), to(#557f9d));
background-image: -webkit-linear-gradient(#227bb9, #557f9d);
background-image: -o-linear-gradient(#227bb9, #557f9d);
background-image: -ms-linear-gradient(#227bb9, #557f9d);
background-image: linear-gradient(#227bb9, #557f9d);
filter: progid:DXImageTransform.Microsoft.gradient(startColorStr='#227bb9', EndColorStr='#557f9d');
-moz-border-radius: 3px;
-webkit-border-radius: 3px;
border-radius: 3px;
text-shadow: 0 1px 0 rgba(0,0,0,.3);
-moz-box-shadow: 0 1px 0 rgba(255, 255, 255, 0.5), 0 3px 0 rgba(0, 0, 0, 0.7);
-webkit-box-shadow: 0 1px 0 rgba(255, 255, 255, 0.5), 0 3px 0 rgba(0, 0, 0, 0.7);
box-shadow: 0 1px 0 rgba(255, 255, 255, 0.5), 0 3px 0 rgba(0, 0, 0, 0.7);
}
#trickstown-contact-wrap .btn:hover {
background-color: #557f9d;
background-image: -moz-linear-gradient(#557f9d, #a5b8da);
background-image: -webkit-gradient(linear, left top, left bottom, from(#557f9d), to(#a5b8da));
background-image: -webkit-linear-gradient(#557f9d, #a5b8da);
background-image: -o-linear-gradient(#557f9d, #a5b8da);
background-image: -ms-linear-gradient(#557f9d, #a5b8da);
background-image: linear-gradient(#557f9d, #a5b8da);
filter: progid:DXImageTransform.Microsoft.gradient(startColorStr='#557f9d', EndColorStr='#a5b8da');
}
#trickstown-contact-wrap .btn:active {
background: #64799e;
position: relative;
top: 2px;
-moz-box-shadow: 0 0 3px rgba(0, 0, 0, 0.7) inset;
-webkit-box-shadow: 0 0 3px rgba(0, 0, 0, 0.7) inset;
box-shadow: 0 0 3px rgba(0, 0, 0, 0.7) inset;
}
#trickstown-contact-wrap form {
background: #fff;
height: auto;
min-height:400px;
}
#trickstown-contact-wrap #custom-form-inner {
margin: 0 auto;
padding-top: 35px;
padding-bottom: 40px;
margin-bottom:20px;
}
#trickstown-contact-wrap label {
font: bold 18px/25px Corbel, Arial, Helvetica;
text-shadow: 0 1px 0 #fff, 0 2px 0 #ccc;
float: left;
margin-right: 10px;
width: 120px;
}
#trickstown-contact-wrap .field {
font: 15px Arial, Helvetica;
padding: 5px;
margin: 0 0 20px 0;
border: 1px solid #b9bdc1;
width: 75%;
color: #797979;
-moz-box-shadow: 0 2px 4px #bbb inset;
-webkit-box-shadow: 0 2px 4px #bbb inset;
box-shadow: 0 2px 4px #bbb inset;
-moz-border-radius: 3px;
-webkit-border-radius: 3px;
border-radius: 3px;
}
#trickstown-contact-wrap .field:focus {
background-color: #F6F5F4;
border-color:rgb(12, 155, 126);
box-shadow:0 0 4px rgb(12, 155, 126);
-webkit-box-shadow:0 0 4px rgb(12, 155, 126);
-moz-box-shadow:0 0 4px rgb(12, 155, 126);
}
#trickstown-contact-wrap .textarea {
height:auto;
min-height:100px;
max-width:75%;
}
</style>
<div class="trickstown">
<span class="close">Close</span>
<div id="trickstown-contact-outer">
<div style=" border-bottom:1px solid #1d1d1d;" id="bioinfo">
<h1>Contact Us</h1><br/>
<h2>Just fill up the form click the send button, we will respond to you shortly.</h2>
<p id="my-tt-message" style="display: block; text-align: center;height: 18px; margin-bottom: 30px; margin-top: 20px;">We are happy to help you always.</p>
<div id="image">
<div id="trickstown-contact-wrap">
<form action="send-mail.php" method="post">
<div id="custom-form-inner">
<label for="name">Name:</label>
<input type="text" class="field" id="name" name="name" placeholder="Enter your name here">
<label for="email">Email:</label>
<input type="email" class="field" id="email" name="email" placeholder="Enter a valid email address">
<label for="message">Message:</label>
<textarea class="field textarea" id="message" name="msg" placeholder="Type in your message here"></textarea>
<br />
<input type="reset" class="btn" value=" Reset">
<input type="submit" name="send" class="btn" value="Submit">
</div>
</form>
</div>
</div>
</div>
<p class="fill-form" style="display: block; "><span>Fill up a form here.</span></p>
<ul id="trickstown-social-icons">
<li><a class="twitter" target="_blank" href="http://www.twitter.com/user-name" title="@trickstown on Twitter">Twitter</a></li>
<li><a class="facebook" target="_blank" href="http://www.facebook.com/user-name" title="Facebook Profile">Facebook</a></li>
<li><a class="google-plus" target="_blank" href="https://plus.google.com/user-name/" title="Google+ Profile">Google+</a></li>
<li><a class="linkedin" target="_blank" href="http://in.linkedin.com/in/user-name" title="Linkedin Profile">LinkedIn</a></li>
</ul>
<p id="trickstown-info" style="font-size: 14px;line-height: 22px;">We are available on social sites too.</p>
</div>
</div>
Copy the below code and name it as send-mail.php.
Please note that don't change the file names if you don't know php.
send-mail.php
<html>Replace YOUR-MAIL-ID with your mail id and save the above code as send-mail.php. Now upload the both files to your server through ftp and enter your details through the form and check your mail.
<head>
<title>Thank You</title>
<link rel="stylesheet" type="text/css" href="style.css" />
</head>
<body>
<div class="main">
<?php
if(isset($_POST['send']))
{
$name=$_POST['name'];
$email=$_POST['email'];
$msg=$_POST['msg'];
$to="YOUR-MAIL-ID";
$from = "Sent From: Tricks Town Contact Form";
$sub = "Contact Message";
$headers='From : '.$email. "\r\n";
$headers='Sender name : '.$name. "\r\n";
$headers='Message : '.$msg. "\r\n";
$headers .= "MIME-Version: 1.0" . "\r\n";
$headers .= "Content-type:text/html;charset=iso-8859-1" . "\r\n";
if (mail ($to, $sub, $headers, $from)) {
echo '<b style="color:#388440; ">Thank you, we will respond you back soon.</b>';
} else {
echo '<b style="color:#e41e1e; ">Something went wrong. Please try again!</b>';
}
}
?>
</div>
</body>
</html>
Please comment below if you have anything to share or ask to ask queries. Thank you. Labels: PHP, Web Design
Wednesday, January 1, 2014
Beautiful contact form for websites in PHP

I have designed this form for my website and I want to share it with you today. You can copy the code and use it in your websites. This form has been developed with CSS3 and PHP and keep in mind that this form is not supported on blogger blogs. If you want an awesome contact form for your blogger blog then read this article.
View Demo
Copy the code below:
contact.php
<!DOCTYPE html PUBLIC "-//W3C//DTD XHTML 1.0 Transitional//EN" "http://www.w3.org/TR/xhtml1/DTD/xhtml1-transitional.dtd">
<html xmlns="http://www.w3.org/1999/xhtml">
<head>
<title>Contact Form</title>
<link rel="stylesheet" type="text/css" href="style.css" />
<script src="http://code.jquery.com/jquery-1.7.2.min.js"></script>
<link type="text/css" rel="stylesheet" href="demo.css">
<script>
function validate()
{
var email=document.getElementById("from").value;
if (email.length==""||email=="Your email id")
{
document.getElementById("fError").innerHTML = "Enter your email";
email.focus;
return false;
}
var mailPattern = /^([a-zA-Z0-9_\.\-])+\@(([a-zA-Z0-9\-])+\.)+([a-zA-Z0-9]{2,4})+$/;
if (!checkEmail(email)) {
document.getElementById("fError").innerHTML = "Invalid email";
debugger;
email.focus;
return false;
}
else
{
document.getElementById("fError").innerHTML = "";
}
var email=document.getElementById("msub").value;
if (email.length==""||email=="Subject of your message")
{
document.getElementById("subError").innerHTML = "Subject required";
email.focus;
return false;
}
else
{
document.getElementById("subError").innerHTML = "";
}
var msg=document.getElementById("msg").value;
if (msg.length==""||msg=="Your message")
{
document.getElementById("msgError").innerHTML = "Enter your message";
email.focus;
return false;
}
else
{
document.getElementById("msgError").innerHTML = "";
}
}
function checkEmail(email) {
var email = email;
var filter = /^([a-zA-Z0-9_\.\-])+\@(([a-zA-Z0-9\-])+\.)+([a-zA-Z0-9]{2,4})+$/;
if (!filter.test(email)) {
// alert('Please provide a valid email address');
// email.focus;
return false;
}
return true;
}
</script>
<script>
$(document).ready(function () {
resetForms();
});
function resetForms() {
document.forms['form1'].reset();
}
</script>
</head>
<body>
<div class="main">
<div class="top">Contact us</div>
<form id="form1" action="send-mail.php" method="post">
<table>
<tr><td>Email</td><td><input type="text" class="field" id="from" name="from" value="Your email id" onblur="if(value=='') value = 'Your email id'" onfocus="if(value=='Your email id') value = ''"></td><td><div id="fError" style="color:#FF0000; font-size:14px;"></div></td></tr>
<tr><td>Name </td><td><input type="text" class="field" id="name" name="name" value="Your name(optional)" onblur="if(value=='') value = 'Your name(optional)'" onfocus="if(value=='Your name(optional)') value = ''"></td><td><div id="fError" style="color:#FF0000; font-size:14px;"></div></td></tr>
<tr><td>Subject </td><td><input type="text" class="field" id="msub" name="msub" value="Subject of your message" onblur="if(value=='') value = 'Subject of your message'" onfocus="if(value=='Subject of your message') value = ''"></td><td><div id="subError" style="color:#FF0000; font-size:14px;"></div></td></tr>
<tr><td>Message</td>
<td>
<textarea type="text" class="msg" id="msg" name="msg" onfocus="if(value=='Your message') value = ''" onblur="if(value=='') value = 'Your message'">Your message</textarea>
</td>
<td><div id="msgError" style="color:#FF0000; font-size:14px;"></div></td>
</tr>
<tr>
<td></td>
<td><input type="submit" class="sendbtn" id="send" name="send" value="Send" onClick="return validate()"></td></tr>
</table>
</form>
</div>
</body>
</html>
Copy the code above and save it as contact.php
The above code contains the form design of contact page. Now lets have another page called send-mail.php. This page receives the data from the form and sends an email to you.
send-mail.php
<html>
<head>
<title>Thank You</title>
<link rel="stylesheet" type="text/css" href="style.css" />
</head>
<?php
if(isset($_POST['send']))
{
$from=$_POST['from'];
$sub=$_POST['msub'];
$msg=$_POST['msg'];
}
$message = "
<html>
<head>
<title>HTML email</title>
</head>
<body>".$msg."</body>
</html>";
$headers='From: '.$from. "\r\n";
$headers .= "MIME-Version: 1.0" . "\r\n";
$headers .= "Content-type:text/html;charset=iso-8859-1" . "\r\n";
mail('your-mail-id-here',$sub,$message,$headers);
?>
<body>
<div class="main">
<div class="top">Success</div>
<?php echo '<b style="color:#388440; ">Thanks for contacting</b>'; ?>
</div>
</body>
</html>
Here in this code you need to replace the line your-mail-id-here with your mail id. Now we have the contact form but the form needs to be designed with stylesheets. I have CSS3 styles for the form.
style.css
bodyCopy those three blocks of code and save them with the names given. Put all these files in the same folder and check them online. Note that this will not work on localhost because mail function will not work on local system.
{
font-family:"Lucida Console", Times, serif;
}
.main
{
width:500px;
margin:0px auto;
}
.field
{
width:300px;
margin:0px 10px 0px 0px;
border:#A8A8A8 solid 2px;
border-radius: 8px;
padding:10px;
box-shadow:1px 0px 9px #6E6E6E;
height:25px;
color:#999999;
font-size:14px;
font-family:Arial, Helvetica, sans-serif;
}
.field:focus
{
border-color:#00AAE7;
box-shadow:0 0 10px #00BDFF; -webkit-box-shadow:0 0 10px #00BDFF; -moz-box-shadow:0 0 10px #00BDFF;
}
textarea
{
color:#999999;
font-family:Arial, Helvetica, sans-serif;
font-size:14px;
width:300px;
height:100px;
margin:0px 10px 0px 0px;
border:#A8A8A8 solid 2px;
border-radius: 8px;
padding:10px;
box-shadow:1px 0px 9px #6E6E6E;
}
textarea:focus
{
border-color:#00AAE7;
box-shadow:0 0 10px #00BDFF; -webkit-box-shadow:0 0 10px #00BDFF; -moz-box-shadow:0 0 10px #00BDFF;
}
.top
{
height:50px;
width:98%;
background:rgb(0, 131, 202);
background-image:url(https://blogger.googleusercontent.com/img/b/R29vZ2xl/AVvXsEiXTtDDA9uizvI8IGws1arkBJQY-wE5MHJcwQ89TFG4XQIqkBttSIJ0W9PP0-wyZnYKWGflht26ODGZLO-NTFkKfaMMQK1N4XxVGwjGMguATnIps-3FH79oemU3R5L5pcEvmO5NDMwWUg/s1600/emf-envelope.png);
background-repeat:no-repeat;
background-position:1%;
border-top-left-radius:7px;
border-top-right-radius:7px;
color:#FFFFFF;
padding-top:12px;
font-size:32px;
text-align:center;
}
.sendbtn{
cursor:pointer;
padding:5px 13px;
background:rgb(0, 131, 202);
border:1px solid #1F96AD;
-moz-border-radius: 10px;
-webkit-border-radius: 10px;
border-radius: 10px;
-webkit-box-shadow: 0 0 4px rgba(0,0,0, .75);
-moz-box-shadow: 0 0 4px rgba(0,0,0, .75);
box-shadow: 0 0 4px rgba(0,0,0, .75);
color:#f3f3f3;
font-size:1.1em;
}
.sendbtn:hover, .sendbtn:focus{
background-color :#13A3D1;
-webkit-box-shadow: 0 0 1px rgba(0,0,0, .75);
-moz-box-shadow: 0 0 1px rgba(0,0,0, .75);
box-shadow: 0 0 1px rgba(0,0,0, .75);
}
Please comment below if you have anything to share or ask your queries. Thank you. Labels: PHP, Web Design
Tuesday, November 5, 2013
Which is the best way to optimize mobile site?
 The idea of looking for articles online making use of mobile devices is
 continuously on the rise, mainly due to the wide variety of mobile
devices and tablets now commonly available in the market. They actually
appear to be improving the cause, and more and more people today are
purchasing and using them. So how are these evolving styles altering
things, and how does it shows impact on you as a website owner?
Earlier, we have seen different ways to optimize our sites for mobile
devices. And there are much more ways to handle this. So which
alternative is the best for offering content to mobile devices?
There are many ways to provide mobile content to your users, and they
are generally considered into three basic categories; Responsive Web
Design (obvious!), dynamic content serving, and creating the mobile
version of a site.
You may like to read:
How to earn money with your facebook pages?
How to add separate contact page to blogger?
How to add facebook like button below blogger posts?
Best practices to write titles for Search Engine Optimization(SEO)
Great tips to reduce loading time of your blog to increase more readers
Idiotic and funny ways you never know to promote your blog
How to earn money from blogs?
Add floating widget to your blogger blog
Get more viewers to your blog using facebook fan page
Responsive Web Design

today. Responsive Web Design (RWD) includes designing content that
automatically resize itself to suit the screen size and resolution of
any mobile device. Here the content itself is rearranging itself, hence
there is no need to create custom redirects to other mobile pages, or
modifying the on-page content itself.
For the user, this would be simple to use, and for a content manager,
it means content only needs to be updated once. From a developer
viewpoint, Responsive Web Design may require rebuilding your site with
flexible templates, grids, style sheets and JavaScript but with very
rewarding results.
Dynamic content serving
This technique is similar to some extent to Responsive Web Design, butat the same time it is also very different from Responsive Web Design.
We discussed that Responsive Web Design detects screen size and
resolution of the mobile device and resizes the content, but in dynamic
content serving the device used by the user is detected at the
server-end, and then the provides a customized page on the same URL.
The custom page is generated dynamically at the server end.
Even though this strategy is very difficult to put into practice and
needs more maintenance, it is the most highly effective method for
offering mobile content to users, and industry experts suggest it for
experienced webmasters.
Separate Mobile Site
The final setup you might want to think about is developing a separatemobile site, where mobile phone users will be directed to a
mobile-optimized version of your site. This implementation enables you
completely personalize your content for a mobile users. Very similar to
making dynamic serving content, this means you need to make separate
updates for content or decorating your mobile site to enable smooth
user experience.
For example we can consider facebook for separate mobile site. It uses facebook mobile version and desktop version. Both looks different and mobile version doesn't allows some extended features. apps, games etc.
If you have anything to suggest please comment below.
Labels: blogger tips, blogging, mobile tips, Web Design
Subscribe to:
Comments (Atom)
